Follow steps as explained to quickly setup raspberry pi with AWS IoT, send data to AWS and save it to DynamoDB.
AWS IoT Concept – Quick overview:
AWS IoT is a platform as a service where we can save data from multiple IoT devices, configure devices, run analytics based on the data collected from them, and many more. It allows an individual device to communicate directly with the AWS platform (using SDK’s for java, python, C, C++) OR IoT devices communicating to AWS Greengrass which acts as a gateway to communicate with AWS platform. We are going to use python SDK running on raspberry pi 4.
1) Setting up IoT Device in AWS:
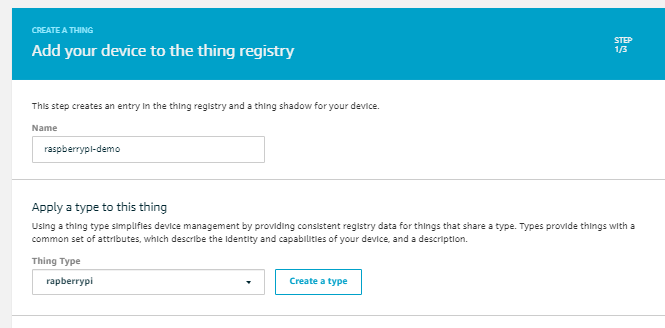
Any IoT device is also referred as a ‘thing’.
Go to IoT Core > Create a new thing > Specify the name and create a type and assign it
Certificates can be used by IoT Devices to communicate with AWS. Click on the recommended certificate creation and download the certificates and root CA for AWS IoT.
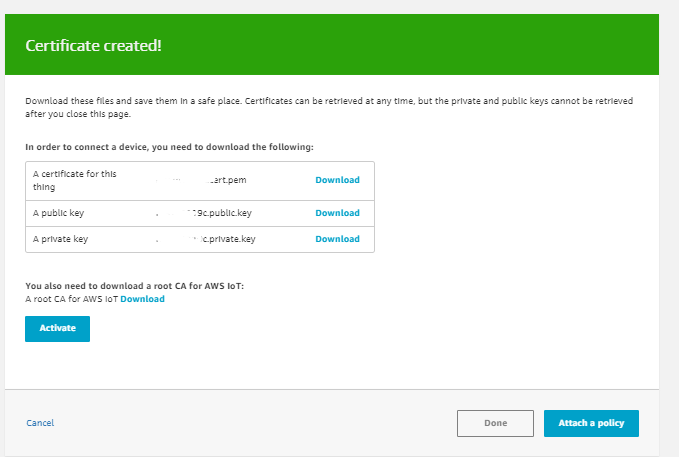
Gave name to the policy and attach it with the newly registered IoT Device.
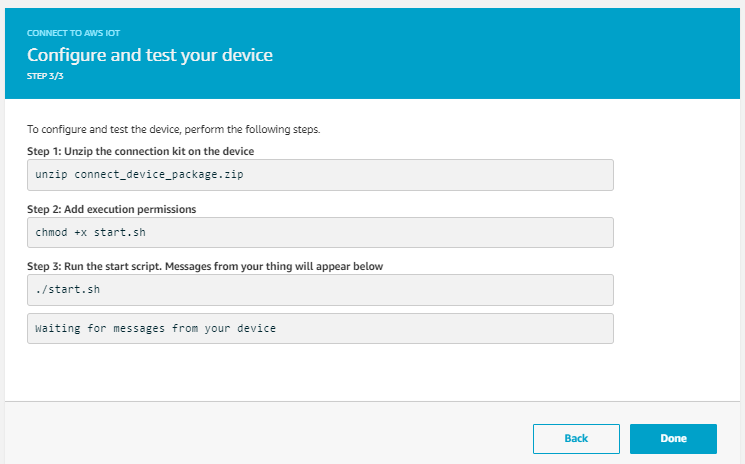
Once the device is registered, navigate to AWS IoT > Onboard > Get Started > Onboard a device
For raspberry pi, we select Linux and Python as SDK > Download connection kit for Linux/OSX . It would download the certificates required for communication with AWS IoT Platform. Copy these files to Raspberry pi and run the following commands to use SDK and connect device to AWS.
2) Setup Raspberry pi to send data to AWS IoT:
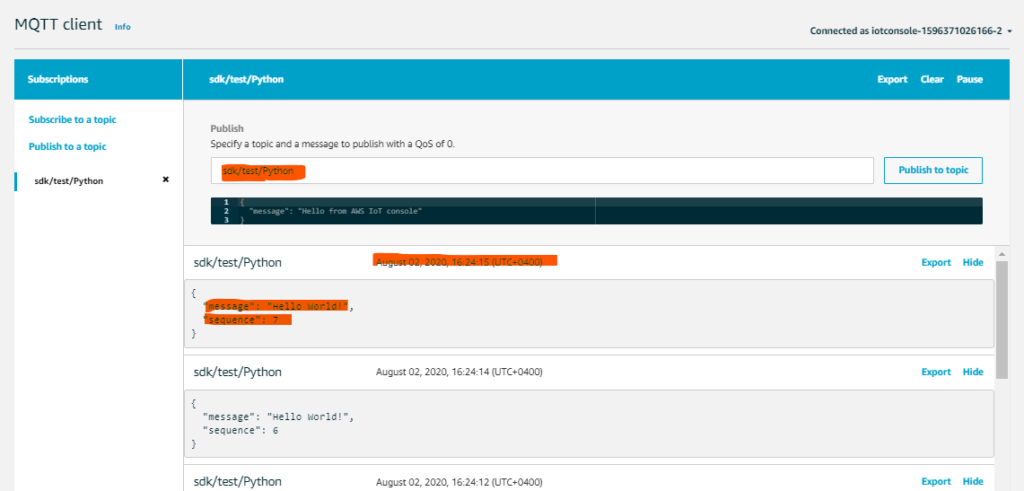
The above command will configure the SDK and will start sending messages to AWS as shown below:
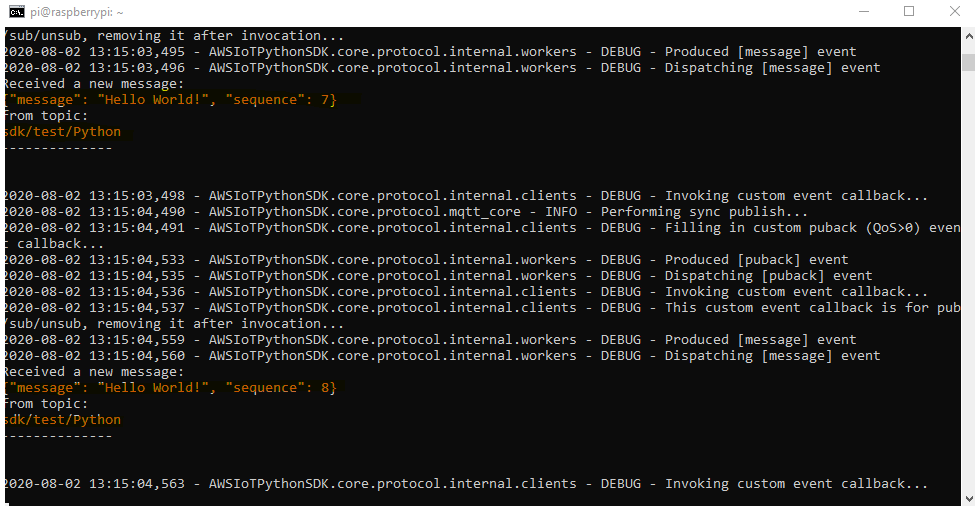
The data includes 2 things: 1) Message and 2) Topic
publish–subscribe is a messaging pattern that is used here. So senders will publish (Send) message to a specific topic (in our case it is sdk/test/python). In order to receive these messages a subscriber (application or in our case AWS) subscribes to the same topic (sdk/test/python) in order to receive.
Let raspberry pi send the data every second. From console, go to IoT Core > Activity > MQTT client as shown below:
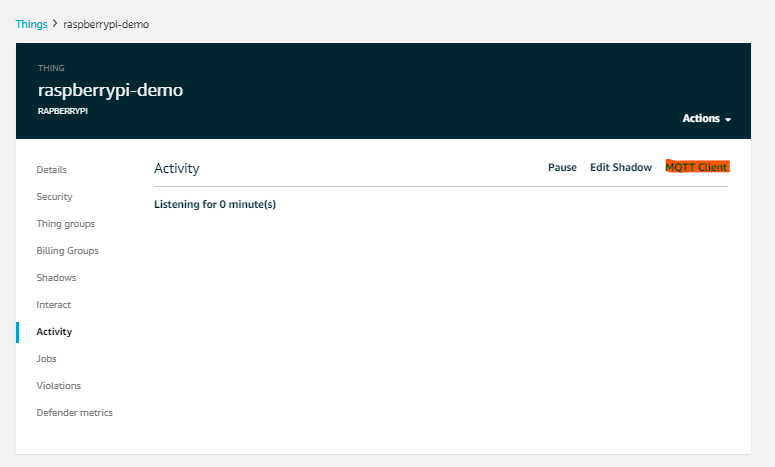
Enter topic name as “sdk/test/Python” and click Subscribe:
Let’s take a look at the files which were downloaded earlier while onboarding the device.
Directory – aws-iot-device-sdk-python pimonitor.py
Root CA Cert – “root-CA.crt”
Private key – “rpi-4demo.private.key”
Device cert- “rpi-4demo.cert.pem”
Public Key – “rpi-4demo.public.key”
start.sh – Runs the SDK and sends “Hello World”
I checked the contents of the file start.sh and came to know that it triggers a sample python file which publishes MQTT messages. The last line in the file actually triggers other python file which is publishing MQTT messages:
Python basicPubSub.py -e endpointname -r root-CA.crt -c rpi-4demo.cert.pem -k rpi-4demo.private.key
Copy this as we are going to use it next. The actual python file is located at “aws-iot-device-sdk python/samples/basicPubSub/basicPubSub.py”
It makes a lot of sense to copy the same file and use it to publish MQTT messages. Use the file with the parameters below. I copied it by the name “pimonitor.py”:
python ./pimonitor.py -e endpointname -r root-CA.crt -c rpi-4demo.cert.pem -k rpi-4demo.private.key -m ‘publish’ -t topicname -M “CUSTOM MESSAGE”
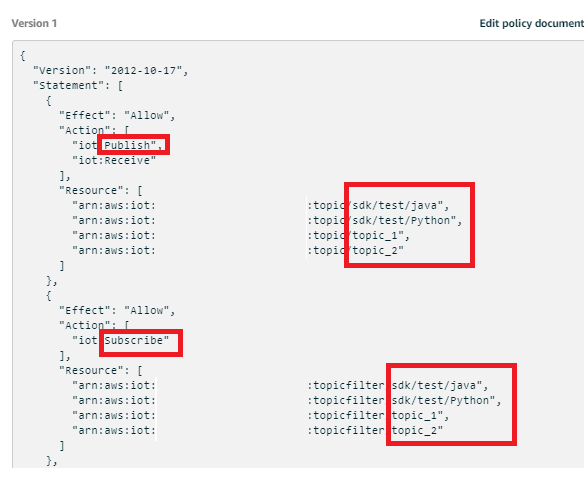
By using the above command, MQTT messages start being published for the specified topic. Make sure that the topic name being used above is included in the AWS IoT policy. Otherwise it throws an error: ERROR – Publish timed out OR Subscribe timed out
Screenshot below shows the default policy under IoT Core > Security > Policies:
Once you are able to publish custom messages, write few lines of python code to get the raspberry pi temperature and send it as a message. I added the following lines of code to read the temperature
os.environ[‘TZ’] = ‘Asia/Dubai’
def measure_temp():
temp=os.popen(“vcgencmd measure_temp”).readline()
temp=temp.strip(“temp=”)
temp=temp.strip(“‘”)
temp=temp.strip(“C\n”)
temp=temp.strip(“‘”)
tempfloat=int(float(temp))
temp=int(tempfloat)
return(temp)
I also added last boot time as:
boottime=os.popen(“uptime -s”).readline()
lastboottime=boottime.strip(“\n”)
Sending messages adds to cost. So I decided to schedule a cron job and send data every hour.
0 */1 * * * python ./pimonitor.py -e endpointname -r root-CA.crt -c pidemo.cert.pem -k pidemo.private.key -m ‘publish’ -t topicname
Create a DynamoDB table and a rule which saves data to different columns in DynamoDB (v2) with the script as:
Select temperature as Temperature, DateTime as time, lastboottime as BootTime from topicname
It took me almost a half-day to complete this. I thought to put everything at a single place in order to keep it easy. Soon I will connect a temperature and humidity sensor to my pi.
Detailed developer guide can be found at AWS Documentation.
Hope this helped. Please share your thoughts in the comment below or CONTACT ME HERE for any question.